

Loop Hero tips: 11 tricks for kicking ass in the grim 'n grindy RPG
Two important Loop Hero tips: goblins will kick your teeth in and know when to
In a quiet-so-far March 2021, Loop Hero has made a nice splash as a simple-but-deep game loaded with secrets. I love this the way that Loop Hero doesn't explain itself, like a pre-internet RPG that you had to ask your friends at school about in order to beat. In that spirit, here's some Loop Hero guidance, if you're struggling to figure out how to use certain cards or just want to know how to build an unstoppable Rogue.
Loop Hero guide: beginning-of-game
Focus on these stats
There isn't a single path to victory in Loop Hero, but I had the most success with each class by building up these stats through cards and gear:
- Warrior: Max HP paired with some kind of HP restoration (regen/sec or per day)
- Rogue: Attack Speed, Evasion, Crit Chance
- Necromancer: Magic HP (the protective layer of HP provided by amulets), Max Skeletons, Attack Speed (this is how quickly you'll summon skeletons)
Later in the game you'll want to use camp items to accentuate these stats even further.
Higher-leveled gear isn't always better
It's tempting to immediately swap in brighter-colored, higher leveled gear, but you should know that rarer, shinier stuff isn't universally better.
Although higher-leveled gear should equate to bigger numbers, those numbers might not be the ones you care about most. Why focus on HP regen if you're perpetually at max HP? If your attack speed is super high, do you really need +10% counter? I'll often stick with a lower-leveled or lower-rarity item if it provides something I absolutely need, like Crit Chance for Rogue.
For reference, here's the rarity of Loop Hero items:
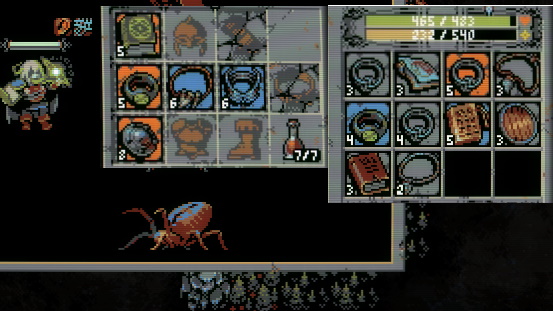
- Grey background (provides one stat boost)
- Blue (two stats)
- Yellow (three stats)
- Orange (four stats)
Also keep in mind that stats that are integer-based don't scale with you as enemies level up with each loop. Focusing on building up Magic Damage (which surpasses defense) might help a lot in the early game, but as you encounter higher-level enemies, that 12 free damage will look like a drop in the bucket. Meanwhile, 33% evasion is helpful throughout a run. A great example of this is the Necromancer. Some lower-level items will grant "+1 Skeleton," which can be a massive difference-maker in extended fights.
Likewise, some gear art in particular will correspond with useful effects. The Rogue's winged boots have ludicrously high evasion that I almost always reach for.
Swapping items too freely also has a minor disadvantage: when you hit max item capacity and earn a new item, the oldest item becomes scrap metal, one of the more important basic resources.
Delay the boss!
The boss spawns on your campfire tile once you've placed a certain number of cards. The map completion bar in the upper left corner corresponds with how many tiles populate the board: watch this closely to make sure you spawn the boss at. If you play every card that comes into your hand all willy-nilly, you'll end up fighting the boss much sooner than you'd like.
Inevitably, this means you'll churn through cards. That's OK: once your hand fills the bottom row of the screen, discarded cards actually become a useful resource you can use at camp. I actually almost completely avoid playing lower-tier cards like Rocks and Forest unless I'm forced to.
Tile adjacency produces bonus resources and surprise effects
Don't just throw those Meadow cards down wherever there's open space: put them next to a Mountain, a building, anything really to improve their effectiveness.
Prioritize the Smelter
For me, The Arsenal was a game-breaking card (it grants an additional gear slot specific to each class) that basically paved the way for late-game victory. Gathering the right materials to build the Smelter in camp is the patch to unlock this.
Don't be afraid to retreat
Loop Hero can be a grindy game if you die often, which nixes 70% of your resources. When you're within one tile of your campfire you can tap out of a run and retreat to camp with all of your collected resources. It's a totally valid strategy to go on "resource runs" and not focus as much on killing a boss.
Loop Hero guide: late-game tips (Acts 3&4)
Abilities matter, a lot
Village cards unlock a new XP and level mechanic, and once you fill that XP bar, you're given a choice between three random abilities from a class-specific ability table. I try to grab abilities that will increase damage or mitigate incoming damage, rather than stuff that boosts resource gathering or metagame enhancers.
But it's definitely possible to get unlucky with what you draw here. For the Rogue, I always insta-grab the ability that grants a 75% to spawn a pet, which can tank a little damage and deal it back. And for the Necromancer, I always take the +1 Max Skeletons ability, which gives me a bit more freedom when selecting which rings and other gear are best. There's an achievement for spawning 10 skeletons, incredibly.
Ruins can mess you up
Ruins spawn up to four giant worms who are apparently so giant that they can attack from one tile away. Be careful about which tiles you place adjacent to a Ruin tile: worms will appear in the back row. Having a full Ruin tile behind a Goblin Encampment is a worst-case scenario.
Load up on Watchtowers
Another base structure worth building as soon as possible are Watchtowers, which each bring one archer into battle on the tiles bordering your campfire. These guys are awesome damage dealers that sit in your back line and plug away at enemies.
...and then make your Campfire area a death-filled nightmare
With three or four archers on your side, killing the toughest enemies in the game becomes surprisingly simple. I concentrate as many enemies as possible in this area so I can cash in a ton of resource and gear rewards. Layering Vampire Mansions, Battlefields, and Temporal Beacons in this area can add additional layers of enemies aside from what sits on the tile itself.
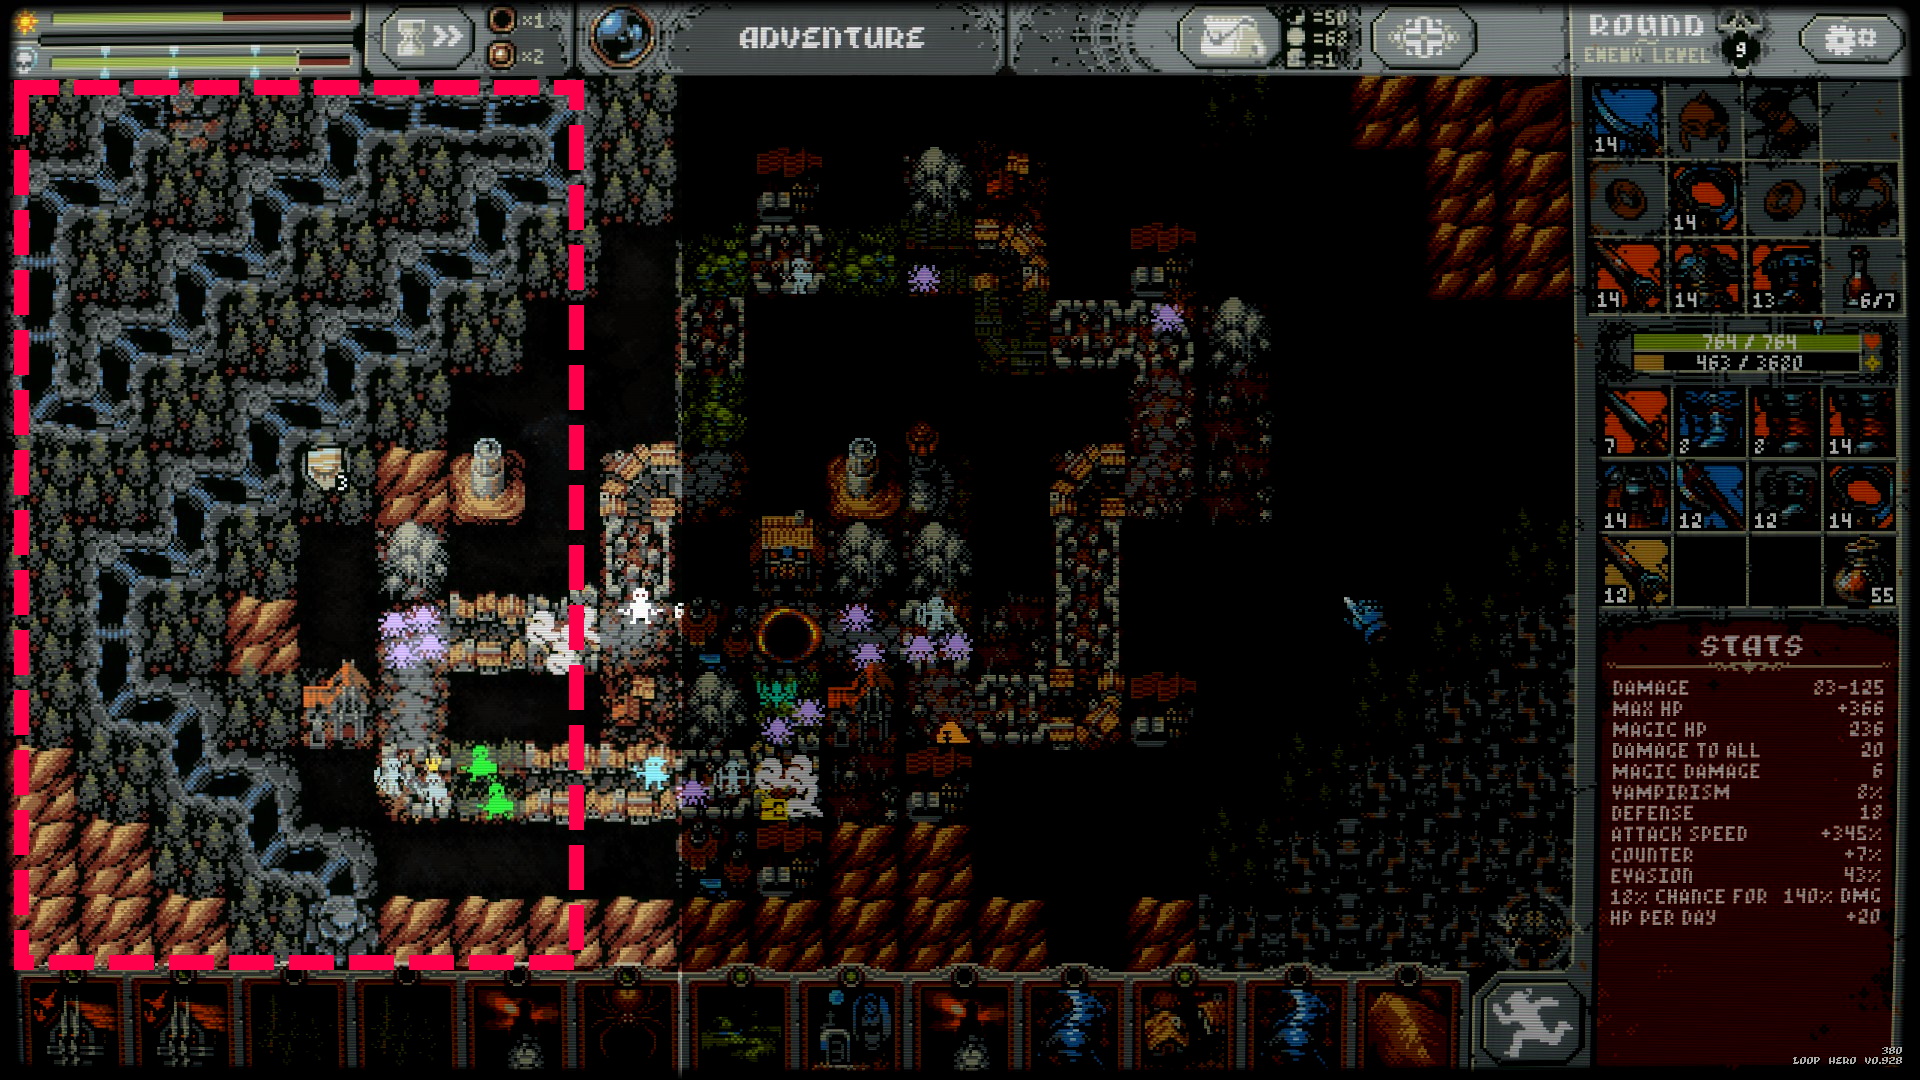
Build a river like this
I found Rivers to be a massively important card for amplifying other stat-boosting cards. They double the effectiveness of anything they're adjacent to, and that doubling stacks if two River tiles border one other tile. So if a Blooming Meadow is surrounded by two River tiles, that's +12 HP (4x3) per Meadow per day. Hell yeah.
A zig-zagging path of L-shaped River tiles maximizes the efficiency of these bonuses.
The best build I've found: Rogue & Arsenal & Thickets & River & Sand Dunes
This is the build I ultimately beat Loop Hero with. Paired with an Arsenal card, the Rogue gains the amulet equipment slot, which provides a free, full layer of HP that you bring into each fight. Huge. With a good amulet and some evasion, I'll often go entire loops without losing any base HP.
Interestingly, Sand Dunes (which lower all creatures' HP) do not affect magic HP. So as I play more and more Sand Dunes, lowering enemies' HP and my base HP, my magic HP shield remains untouched and disproportionately useful. Thanks, amulet.
And because I'm not focused on max HP at all, I don't bring Meadows or Mountain cards to battle. Instead I focus almost exclusively on pairing River cards with Thickets to (eventually) get up to about +300% attack speed. At that point most battles are a blur.
from PCGamer latest https://ift.tt/3c9A5AT
Two important Loop Hero tips: goblins will kick your teeth in and know when to
In a quiet-so-far March 2021, Loop Hero has made a nice splash as a simple-but-deep game loaded with secrets. I love this the way that Loop Hero doesn't explain itself, like a pre-internet RPG that you had to ask your friends at school about in order to beat. In that spirit, here's some Loop Hero guidance, if you're struggling to figure out how to use certain cards or just want to know how to build an unstoppable Rogue.
Loop Hero guide: beginning-of-game
Focus on these stats
There isn't a single path to victory in Loop Hero, but I had the most success with each class by building up these stats through cards and gear:
- Warrior: Max HP paired with some kind of HP restoration (regen/sec or per day)
- Rogue: Attack Speed, Evasion, Crit Chance
- Necromancer: Magic HP (the protective layer of HP provided by amulets), Max Skeletons, Attack Speed (this is how quickly you'll summon skeletons)
Later in the game you'll want to use camp items to accentuate these stats even further.
Higher-leveled gear isn't always better
It's tempting to immediately swap in brighter-colored, higher leveled gear, but you should know that rarer, shinier stuff isn't universally better.
Although higher-leveled gear should equate to bigger numbers, those numbers might not be the ones you care about most. Why focus on HP regen if you're perpetually at max HP? If your attack speed is super high, do you really need +10% counter? I'll often stick with a lower-leveled or lower-rarity item if it provides something I absolutely need, like Crit Chance for Rogue.
For reference, here's the rarity of Loop Hero items:
- Grey background (provides one stat boost)
- Blue (two stats)
- Yellow (three stats)
- Orange (four stats)
Also keep in mind that stats that are integer-based don't scale with you as enemies level up with each loop. Focusing on building up Magic Damage (which surpasses defense) might help a lot in the early game, but as you encounter higher-level enemies, that 12 free damage will look like a drop in the bucket. Meanwhile, 33% evasion is helpful throughout a run. A great example of this is the Necromancer. Some lower-level items will grant "+1 Skeleton," which can be a massive difference-maker in extended fights.
Likewise, some gear art in particular will correspond with useful effects. The Rogue's winged boots have ludicrously high evasion that I almost always reach for.
Swapping items too freely also has a minor disadvantage: when you hit max item capacity and earn a new item, the oldest item becomes scrap metal, one of the more important basic resources.
Delay the boss!
The boss spawns on your campfire tile once you've placed a certain number of cards. The map completion bar in the upper left corner corresponds with how many tiles populate the board: watch this closely to make sure you spawn the boss at. If you play every card that comes into your hand all willy-nilly, you'll end up fighting the boss much sooner than you'd like.
Inevitably, this means you'll churn through cards. That's OK: once your hand fills the bottom row of the screen, discarded cards actually become a useful resource you can use at camp. I actually almost completely avoid playing lower-tier cards like Rocks and Forest unless I'm forced to.
Tile adjacency produces bonus resources and surprise effects
Don't just throw those Meadow cards down wherever there's open space: put them next to a Mountain, a building, anything really to improve their effectiveness.
Prioritize the Smelter
For me, The Arsenal was a game-breaking card (it grants an additional gear slot specific to each class) that basically paved the way for late-game victory. Gathering the right materials to build the Smelter in camp is the patch to unlock this.
Don't be afraid to retreat
Loop Hero can be a grindy game if you die often, which nixes 70% of your resources. When you're within one tile of your campfire you can tap out of a run and retreat to camp with all of your collected resources. It's a totally valid strategy to go on "resource runs" and not focus as much on killing a boss.
Loop Hero guide: late-game tips (Acts 3&4)
Abilities matter, a lot
Village cards unlock a new XP and level mechanic, and once you fill that XP bar, you're given a choice between three random abilities from a class-specific ability table. I try to grab abilities that will increase damage or mitigate incoming damage, rather than stuff that boosts resource gathering or metagame enhancers.
But it's definitely possible to get unlucky with what you draw here. For the Rogue, I always insta-grab the ability that grants a 75% to spawn a pet, which can tank a little damage and deal it back. And for the Necromancer, I always take the +1 Max Skeletons ability, which gives me a bit more freedom when selecting which rings and other gear are best. There's an achievement for spawning 10 skeletons, incredibly.
Ruins can mess you up
Ruins spawn up to four giant worms who are apparently so giant that they can attack from one tile away. Be careful about which tiles you place adjacent to a Ruin tile: worms will appear in the back row. Having a full Ruin tile behind a Goblin Encampment is a worst-case scenario.
Load up on Watchtowers
Another base structure worth building as soon as possible are Watchtowers, which each bring one archer into battle on the tiles bordering your campfire. These guys are awesome damage dealers that sit in your back line and plug away at enemies.
...and then make your Campfire area a death-filled nightmare
With three or four archers on your side, killing the toughest enemies in the game becomes surprisingly simple. I concentrate as many enemies as possible in this area so I can cash in a ton of resource and gear rewards. Layering Vampire Mansions, Battlefields, and Temporal Beacons in this area can add additional layers of enemies aside from what sits on the tile itself.
Build a river like this
I found Rivers to be a massively important card for amplifying other stat-boosting cards. They double the effectiveness of anything they're adjacent to, and that doubling stacks if two River tiles border one other tile. So if a Blooming Meadow is surrounded by two River tiles, that's +12 HP (4x3) per Meadow per day. Hell yeah.
A zig-zagging path of L-shaped River tiles maximizes the efficiency of these bonuses.
The best build I've found: Rogue & Arsenal & Thickets & River & Sand Dunes
This is the build I ultimately beat Loop Hero with. Paired with an Arsenal card, the Rogue gains the amulet equipment slot, which provides a free, full layer of HP that you bring into each fight. Huge. With a good amulet and some evasion, I'll often go entire loops without losing any base HP.
Interestingly, Sand Dunes (which lower all creatures' HP) do not affect magic HP. So as I play more and more Sand Dunes, lowering enemies' HP and my base HP, my magic HP shield remains untouched and disproportionately useful. Thanks, amulet.
And because I'm not focused on max HP at all, I don't bring Meadows or Mountain cards to battle. Instead I focus almost exclusively on pairing River cards with Thickets to (eventually) get up to about +300% attack speed. At that point most battles are a blur.
via IFTTT

Post a Comment